Monday

Practice Basic Internet Safety in Context with Edmodo


Do children and social media mix?  I wanted to teach my students basic internet safety in a real context.  I recently had the opportunity to attend a workshop on Edmodo.  Whenever I heard about teachers talking about creating a class page with their students, Edmodo always came up.  And I'm interested in using technology more with my students;  I already had a classroom blog which I talked about in this post.  I just didn't know how Edmodo was different.

Practice Basic Internet Safety in Context with Edmodo

The instructors likened Edmodo to Facebook.  While I wouldn't "sell" it to parents in that way, the kids did see the connection right away and were excited about all the features:
Basic Internet Safety with Student Comments and Posts
  1. Kids can personalize their account complete with avatar, learning style, career goal, and inspirational quote (they can even search by famous person within the system).
  2. Kids can reply to posts.
  3. Kids can write their own posts for others to reply to.
  4. Kids can upload photos, links, and documents.
  5. Teachers can post all of the above as well as polls and quizzes (very similar to using Google forms, but integrated onto Edmodo itself).
  6. Teachers can enter dates and assignments into an integrated calendar.
  7. There's an app for that (Apple and Android).
However, Edmodo is designed for children and therefore has safeguards against predators as well as cyber bullying. 

Practice Basic Internet Safety with a Classroom Code

First, when you sign up for Edmodo as a teacher, you are given a "classroom code."  You will give that code to your students when you sign them up, and no one else can see the page unless they register with that code.  It's not the same as a password, in that the children will sign in with a username and password each time they log in, but the code is only used by them once when the register.  Once your whole class registers, you can "lock" the group.  If you get a new student later in the year you can reset the code to register that student (students who registered already don't need to re-register with the new code).  So the bottom line is, to facilitate basic internet safety, no one is getting on now or later without your help.
Second, unlike Facebook and other social media sites, to promote basic internet safety, there is no private messaging between students.  Anything a child writes will be seen by you and every other child in the class, and it will be logged under their real first name.  If a child was going to say something inappropriate, it would be as if they stood up in the middle of class to say it; it's all out in the open.  Cyber-bullying is often perpetuated by individuals who are emboldened by anonymity.  Having comments out in the open is an important feature of basic internet safety for children learning to communicate online.  You even have the option (in case you do have a "bold" class this year) to "moderate" comments.  That is, you can set their posts to stay hidden from the other kids until you approve each one.  This is the perfect way to scaffold for students who need more or less support though the year as they practice basic internet safety in their comments and posts.

Get Parents on Board with Basic Internet Safety Practices

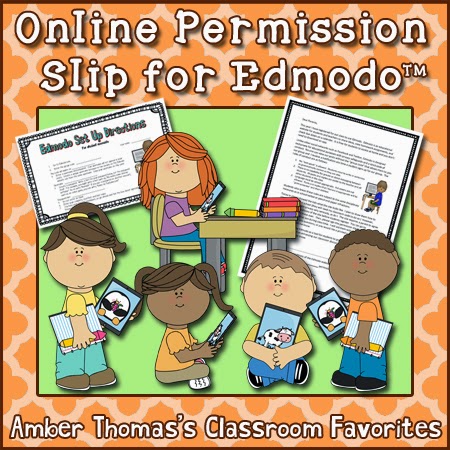
Edmodo does not require an Email to sign up (unlike most websites that you create accounts for).  The only tricky thing about signup is that children need to tick a box that says their parent has read and agreed to the terms of use.  Out of respect to this rule, I sent home a permission slip that granted the children permission to tick the box in class during my introductory lesson.  [Update] A reader requested a copy of this permission slip.  I've added it to my TPT store for free for a limited time, so if you're interested, grab it now!
http://www.teacherspayteachers.com/Product/Edmodo-Permission-Slip-Free-1195367I've used Edmodo for 2 weeks now, and honestly I am not sure I love it more than the classroom blog.  Tomorrow over on Shut the Door and Teach I will be writing a pros and cons list for Edmodo versus Weebly. 

So if you're interested in Edmodo, I feel it IS worth trying, but you might find a different platform suits your needs better.

Pinterest Facebook TPT Instagram

Tuesday

Writing Across the Curriculum with Science Observations


In order to MAKE time when there's no time to be found, writing across the curriculum means incorporating writing instruction into science time.  With Common Core putting more pressure on us than ever to focus on math, reading and writing, it can feel like a constant struggle to "fit in science and social studies" at the elementary level.  One of the best matches I've found is to marry the idea of teaching the five senses observations as content area objectives while practicing writing using sensory details.

Writing Across the Curriculum:  Science Observations

This mini unit works really well at the beginning of the school year, when the kids are naturally curious about observing their new learning environment.  After a quick review of our content area objectives (defining the 5 senses) I split them up into teams to scope out defined areas of the room. Armed with clipboards, they are ready to record as many observations as they can in 3 minute chunks of time.
Once they have a wide collection, I have them narrow down their list to 3 objects to make sure they described them using 3 senses (inevitably their first list features nothing but sight, in spite of the review).  We play a little guessing game to see how detailed their descriptions are, and then the real content area vocabulary lesson begins.

From the three students choose a single object to focus on.  For our sense of sight and touch I spend time going over domain specific vocabulary; something emphasized in common core writing. 

While most kids focus on the color of objects (something we'll return to later in the year for figurative language) opacity is a new concept.  They tend to forget to mention size as well, so with the explicit instruction this concept can be differentiated.  Some students are ready to go grab a ruler and find a precise length of their object. 

Others need to use comparative statements before they are ready to apply what they know about length, width or height find the measurements of their object.  These comparisons help students understand the science content while practicing writing across the curriculum.  The quality of their writing improves with explicit instruction of science vocabulary. 

Writing Across the Curriculum:  Science observations paragraph

The end result of this data collection process is a multi-paragraph informational piece of writing, which is great for common core, as well an understanding of how to conduct scientific observations in order to explore the world around them.  

What's your favorite way to foster Writing Across the Curriculum and integrate writing into other content areas?

Pinterest Facebook TPT Instagram

Thursday

Organizing the Classroom Materials Shelf


I made a few minor changes to the Students' Materials Shelf a while back.  Since I decided the theme of my changes this year would be "consistency," I swapped out the few Sterilite shoeboxes to give my Math Manipulatives Area a cohesive look.  So I thought it would be a good idea to get more lime green and aqua containers for this shelf.  I love the little Unitz crates from Staples, so I thought I'd just get more of the same.

The Before Photo
Unfortunately, it appears they have been discontinued.  :(

My next dilemma was what to do with the larger items, like rulers, hole punchers, tape dispensers and staplers.  I've never been sure how to house these, and then I got a great idea:  paper trays.  I could create vertical storage and the kids could take a whole tray with them when it was time to distribute them to groups.

Unfortunately, that was not meant to be either.  They're not tall enough, the rulers fell out of them, and they sagged under the weight.  But other than that...

So I'm still not happy with my materials shelf situation.  If anyone could give me advice in the comments below I'd be grateful! 

On the other hand, I made a few positive changes.

I found some lime green baskets in Target's Dollar Spot.  They're not exactly what I wanted since I can't stack them, but they're a good size for my highlighters, Sharpies and scissors.  I also found some tiny striped boxes at Target that fit inside my wooden box to hold paper clips, staples and erasers.  That's a plus because the paper clips could slide under the dividers in the wooden box; hopefully this will contain them better.  And finally I found some cute pails, also in the Dollar Spot that I'm not sure what to do with; I only found a use for one of them (holding my chart paper markers).  That plus some Frixion pens on sale meant a successful shopping trip that day!

The next improvement I made was to my mini trash.  It fits in with the theme with the help of a bit of Duck Tape.  The mini trash was a real success last year when it came to reducing sticky note wrappers and the like being stuffed any old place on the shelf by kids who were too lazy to walk 15 feet to the barrel, haha.  Seriously, my class this past year was one of my neatest ever and I think organization tricks like this help.  Now it also fits in!

Another good use for the Duck Tape was to create a border on the lip of each shelf.  Like the bookshelf, this shelf is so old and worn it has given the kids and I splinters.  So not only does the border tie in with my color scheme, it will hopefully also prevent some nurse visits!

So this shelf is still a work in progress, unfortunately.  I'll check Pinterest, but if anyone can advise me on the ruler, stapler, hole punch and tape dispenser situation I'd be appreciative.  I'm sure they are not going to stay balanced on top of the paper trays as shown below once the kids arrive! 

Update:  Thank you to Kim from Quintessential Lessons for a great solution to my ruler dilemma! Although a Pringles can is too tall to fit on my shelf, I could lay it flat if rolling wasn't such a problem.  However I had on hand a rectangular prism shaped can (Bentley tea tin) that now fits in well thanks to some Duck Tape!

Still looking for ideas on how to stack the tape dispensers, hole punchers and staplers.  Does anyone have a solution?


Pinterest Facebook TPT Instagram

Originally posted on All Things Upper Elementary

Monday

Estimating on Number Lines


I have found that estimating on a number line was a big shift for my class.  At first, they looked like EXPERT estimators; I was ready to hug their third grade teachers.  But then problems kept cropping up.  Why were they suddenly struggling?  Everyone knew that 48,053 rounds to 50,000 and everyone knew 21,923 rounds to 20,000.

https://www.teacherspayteachers.com/Product/Number-Line-Worksheets-for-Place-Value-in-the-Thousands-276294
It was pretty clear that when I asked them to round 34,356 to the nearest hundred and suddenly they looked like deer in the headlights that place value was the issue.  Oh, they all whizzed through chapter 1 and knew their word form and expanded form and lined up numbers in columns like pros.  And we've practiced regrouping on a daily basis in our Every Day Counts routine.  But they are still not able to put it all together to really conceptualize how numbers differ. 

To fix this I designed two activities.  The first was "Pin the Number on the Number line."  I started out with a single sticky note with the number 35,421 on it.  Then I created four number lines on sentence strips based on that number.  Each number line represented a different place value:
Ten thousands:  10,000  20,000  30,000  40,000 and so on.
Thousands:  30,000  31,000  32,000  33,000  34,000   35,000  36,000 and so on.

And so on for the hundreds and tens...notice that the original number will fit on both of the number lines.  All the number lines were designed to have a space where the given number would fit into. 

Next I wrote 7 more sticky notes that could all fit somewhere on the tens number line, since of course that line would have the most limited choice.

For the activity, I put a number line at each table and had students rotate through, working with a partner to determine where to place the sticky note would go each time, and record it onto their sheets.  As they finished they switched sticky notes with others to get more practice. 

https://www.teacherspayteachers.com/Product/Number-Line-Worksheets-for-Place-Value-in-the-Thousands-276294This activity was simple enough for all students, yet it gave them the practice they needed to start looking at a number more than one way.  They had to switch the focus of the place value at each spot.  Since they already had the concept of the 5 determining if a rounded number is larger or smaller than the original, I didn't even focus on that in this lesson.  It was all about find the place value and determining what the higher or lower value was.  In fact, when they sat down and looked at their recording sheets with the higher and lower value their number fell between, they automatically made the connection to circle which of the two the number rounded to.

I have a no prep version of this estimating to the hundred thousands place activity available in the form of Number Line Worksheets.  This packet is part of my Estimating Bundle.  Or if you'd like to read more, I had an estimating extension activity that I cycled students through.  This estimating activity was also hands on, but instead of using number lines as a tool I used money to help us estimate! 
Pinterest Facebook TPT Instagram
Originally posted on All Things Upper Elementary

Sunday

Classroom Rules Activity: Main Idea and Details


Every year I start out by talking to my fourth graders about rules.  But by fourth grade, they already know, on paper, what classroom rules should be.  So I've always asked them what they think the rules should be instead of telling them "these are my rules." 

And yet until last year, I would alter those rules, combine with other ideas, throw out "obvious" rules, until lo and behold, their rules were the same as I happened to have on my poster that I'd secretly kept from the previous years.

I don't do that anymore!

Of course, when my students list rules, some are too general, some are more motivational phrases than actionable rules, and a couple are rules that I feel are actually unnecessary.  They also used to be an overabundance of "Don'ts," however once this went out of fashion a few years ago, it seems that by the time they get to my class nowadays they've had enough models of rules phrased as a positive ("stay quiet" instead of "don't talk") that I don't even have to "fix" those (I allow some, I just keep them in the minority).  So of course I still need to "tweak" their rules, but I do NOT put up the same poster every year.

The trouble we DO run into is that we can end up with nearly 50 rules.  So I tell them, "obviously we are never going to be able to remember every single rule on its own.  So it's going to be very hard to follow them!  Are there any we can throw out?"  Once we realize that they are in fact all important, I promise them, "tomorrow I'll teach you a way that we can group these rules to make them easier."

How to Teach Main Ideas and Details

This is when our discussion about rules turns into a reading/writing/executive functioning lesson: sorting details from main ideas.  This is usually SO difficult for kids to grasp, and I used to think it was so hard to teach (since I used to be bad at it when I was their age).  So I model it in the easiest way I know; so simple that many preschoolers would have some success: relate it to animals. 

I start sticking these cards on the board, and at the end I write the sentence in blue.  They're all yelling out the answer before I can even finish the question. 

Next I tell them to think about ways they're alike, and tell me what groups to put them into.  I draw 3 columns as a hint, and listen in as they "turn and talk with a partner."  When they answer, they will usually say, "These 3 are all birds," I'll ask, "How do you know?"  This is because we'll be talking about "finding evidence" a LOT this year.  And finally we name the groups.

Next I ask if there is any other way we can sort these words.  I move "eagle" over into the middle column and ask if the animals are all related in some way.  Kids might see that they are all wild animals.  I ask if robins and blue jays are different; are they not wild animals?  We start to find that there is more than one way to name the groups; sometimes it results in the cards being in different columns, and there is no one right answer.

How to Relate Main Idea and Details to Rules

Next, I gave each group a set of sentence strips.  Last year I "fixed" the strips so that each group would come to a single main idea.  I even threw a main idea strip into the mix to see if they could find it and check if the rules below it "fit inside it." 


This year I mostly fixed the strip distribution it so that each group would have 2 sets of details, and they had to figure out the main idea on their own.  They still have plenty to learn when it comes to compromise and hearing all voices, but I was able to point out some positive behaviors for others to watch and learn from.

In the end, we were able to come up with 5 topics.  Some groups realized their main ideas were synonymous so we needed to combine their piles into one.  Some strips needed resorting the next day, and another lesson was needed to change the topics into main idea sentences (the model I gave them was "Learn as much as you can.") 

https://www.teacherspayteachers.com/Product/Decimal-War-Card-Game-1162032There are some rules that I think fit better on a different poster, and the "talking rules" makes me cringe because it's not a fantastic main idea sentence, however the class feels a sense of ownership over these rules.  When we had a fire drill today they pointed out that we needed to add to the safety rules.  Having 5 main ideas to focus on, especially when they were all their own ideas is very manageable.  And yet for those "black or white" thinkers, having the sub-rules that help clarify and define the general rules is helpful.  

We still have more work to do such as talking about how it feels when others break the rules that the rest of us are following (using role playing) as well as talking about their rights as students in our class (which will lead into our unit on government and the Constitution).  I have an editable version of our Classroom Rules and Students Rights available.  I hope this introductory lesson works well for your fourth graders! 

Pinterest Facebook TPT Instagram


Originally posted on All Things Upper Elementary

Tuesday

Use Summertime Efficiently for Next Year's Class


I hope you're having a fun, relaxing summer vacation! Although my vacation has just started, I know some of you are getting ready for next year.  Besides, there are some years I get started on the next year the week after my former kiddos leave!  Often I don't mind giving up some vacation time to devote to school; it's such a nice contrast to be able to pace myself instead of feeling rushed the week before.

After everything was packed up, I started looking over my photos to plan my shopping trips for a few projects.  You can read about my "Summer Projects" that are all about updating several areas of my classroom to improve the look and organization of our daily work.  
I've also started printing, laminating, and one of those tasks that is one of the most time consuming (but somehow gratifying!) each summer, which is personalizing the space for this group of kids.  All the name tags, folders, bulletin board name plates and labels require names.  And I know, fourth graders can write their names on a lot of items like notebooks and folders.  However I happen to enjoy writing them myself.  It's a small way to model my expectations for neat printing, give them a taste of things to come with carefully written cursive letters, and it helps me remember who's in my class more easily, even if I can't match names with faces until the first day. 

So for now, all the printing, laminating, cutting and handwriting names will continue each summer.  I've created a to do list for myself so I can stay on track.  Just because I enjoy a leisurely pace doesn't mean I want to waste time with more than one trip to the laminating machine!  My Back to School to do List is free and editable if you're interested in getting a system in writing that you don't have to have to think about much from one year to the next (other than some updating).  

A final tip I have for you if you're like me, and you like using some of your summer vacation to prepare for a smoother school year:  Make extra EVERYTHING.  In the above picture I have at least 5 blank name tags, 5 blank leaves for my Welcome Back bulletin board, and so on.  There are at least 3 good reasons for this:
  1. The laminator inevitably eats something. 
  2. The class lists inevitably change.  I know, some teachers feel that names should not go on things until those lists are finalized.  However I feel it's much less stressful to write 1 or 2 names 10 times a few days before school starts than have to write the entire class's names on everything a couple days before. 
  3. New students inevitably join our class later in the year, often with very little advance notice.  I keep an envelope titled "New Student Materials" in which I toss all my extras that I make at the same time as everyone else.  This, along with my New Student Orientation List has significantly cut down on the stress of getting that phone call from the office, "You have a new student coming in tomorrow."  Now I can devote my energy into thinking about how to integrate him/her socially and academically instead of having to reprint a leaf for a bulletin board.  My New Student Orientation List is free for a limited time, and of course it's editable.
Do you have any tricks and tips for using summertime efficiently?
Pinterest Facebook TPT Instagram
This post originally appeared  on All Things Upper Elementary.
Related Posts Plugin for WordPress, Blogger...